Setup & Settings
Installation
First, you need to install the plugin from the Figma Community by clicking on the ”Open in…” or “Open in Dev Mode” button.
You can find the Tolgee plugin in Figma by clicking the Actions icon (shortcut CTRL + K or ⌘ + K) → “Plugins & widgets” in the toolbar, search for "Tolgee," and click Run.
Alternatively, click the Figma button in the top left corner, then select Plugins → Manage Plugins… and search for Tolgee
Setup
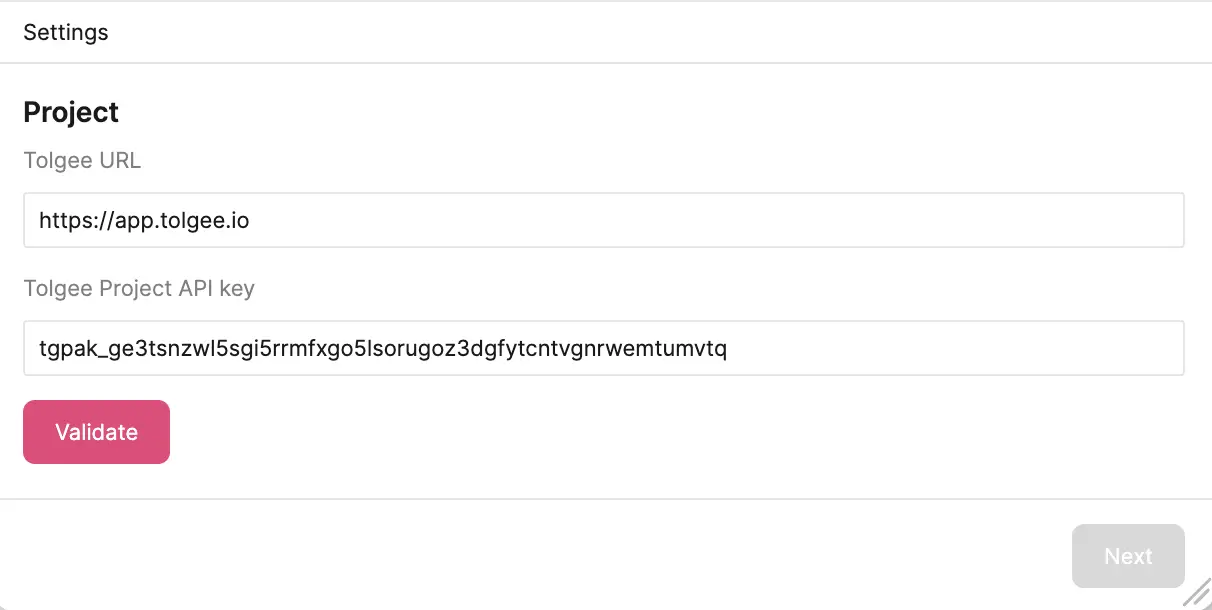
After installing and launching the plugin, you need to insert an API key. If you don't have one, you can check out our documentation on how to generate an API key.
If you are using the self-hosted version, you can update the "Tolgee URL" field to the URL of your instance.
Then you need to click on Validate to validate the provided credentials.
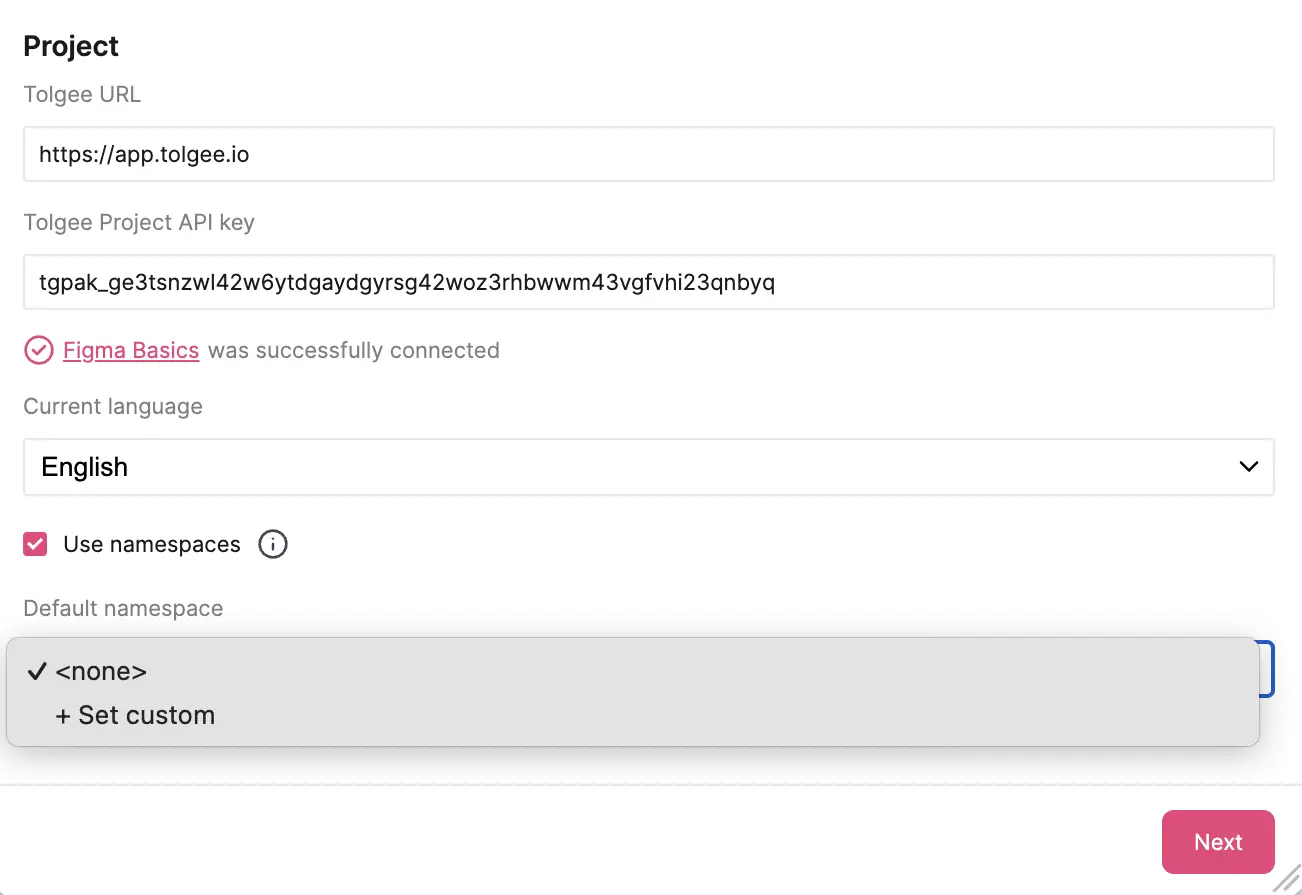
After the credentials are validated, you can see the name of the connected project. Clicking on the name will take you to the project page on the platform. Next, you can select the current language of your Figma file.

Use Namespaces
After connecting to the project with an API key, you will see a checkbox for using namespaces.
When ticking the checkbox, additional settings appear under it. Make sure to scroll down as they may be outside your current window size.
In the default namespaces selector, you can choose from existing ones or create a new one by clicking + Set custom, and then you can choose a name for it.
Settings
In this section, you can find out how to use more detailed features of the plugin, such as prefilling keys, omitting numbers or text that does not need translating.
Strings and Keys
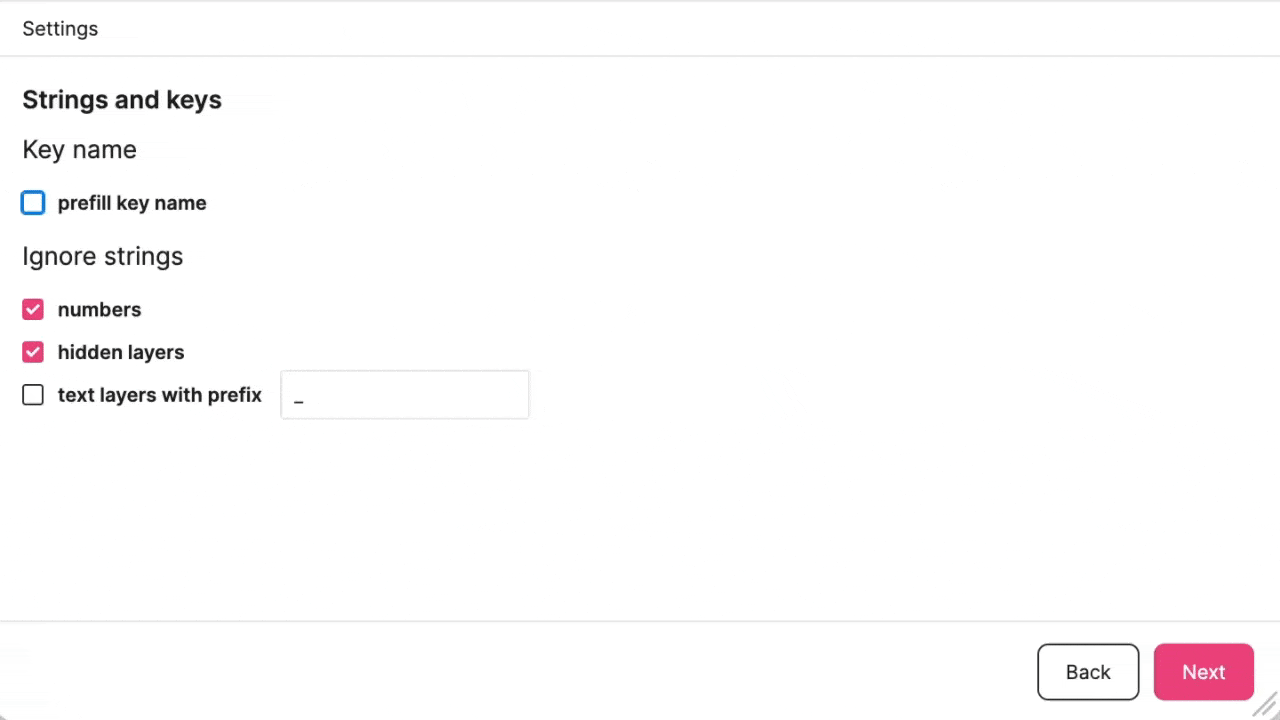
After initial setup and clicking Next, you can see additional settings that have two parts Key name and Ignore strings.
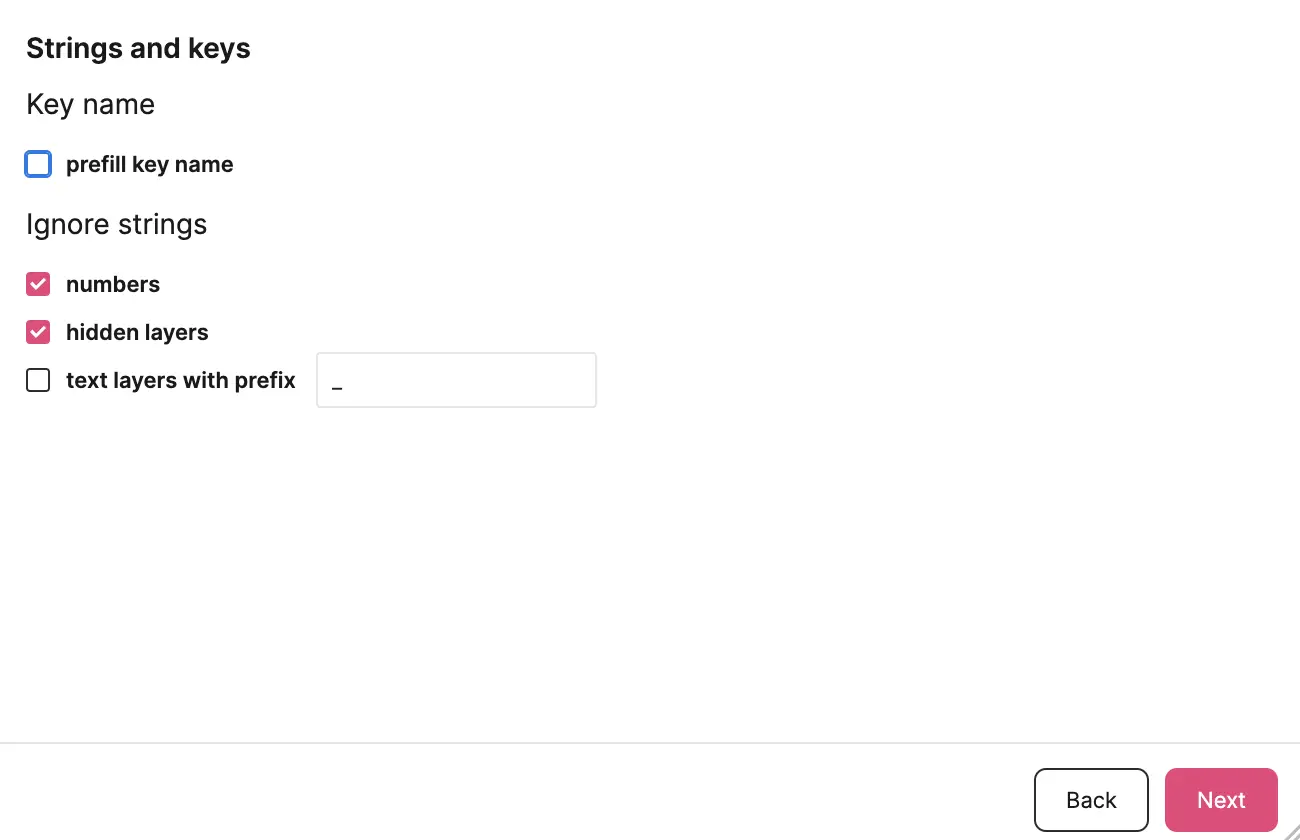
Key Name
Prefill key name section helps you automatically generate names for the translation keys based on the information that you have in figma using information like the name of the element or the frame.
After clicking on the checkbox prefill key name, you will see a field called Key format and a selector Formatting style. When you start choosing the options, there will also be a preview at the bottom so you can see what it will look like before continuing.
Working with Key format:
The key format field lets you customize how the prefilled keys will look like. It creates a template for all the keys that will be prefilled. The template can be defined with text, separators, and variables.
When clicking on Key format, you will see the following variables to choose from:
- artboard (name of the artboard frame)
- component (name of the nearest component)
- element name (name of the string)
- element text (displayed text of the string)
- frame (name of the nearest frame)
- group (name of the nearest group)
- section (name of the nearest section)
You can click on whichever variables you like and add them. Between the parts, you can use separators like ".", ":", etc., or static text.
Formatting style lets you choose how auto-generated keys will be formatted. It helps you maintain consistent formatting by automatically handling spaces and capitalization.
The following options for Formatting style are available:
- keep original format
- element_name
- Element_name
- elementName
- ElementName
- elementname
So if the original text is "Element name", it will change it according to the format that you choose.
Ignore Strings
These checkboxes allow you to choose which string will not be used for localization. Hidden layers and numbers are hidden by default, as in most cases, they do not need to be translated. Additionally, you can also hide text layers with a specific prefix of your choise. By default, it is prefilled with an underscore sign, but you can change it.
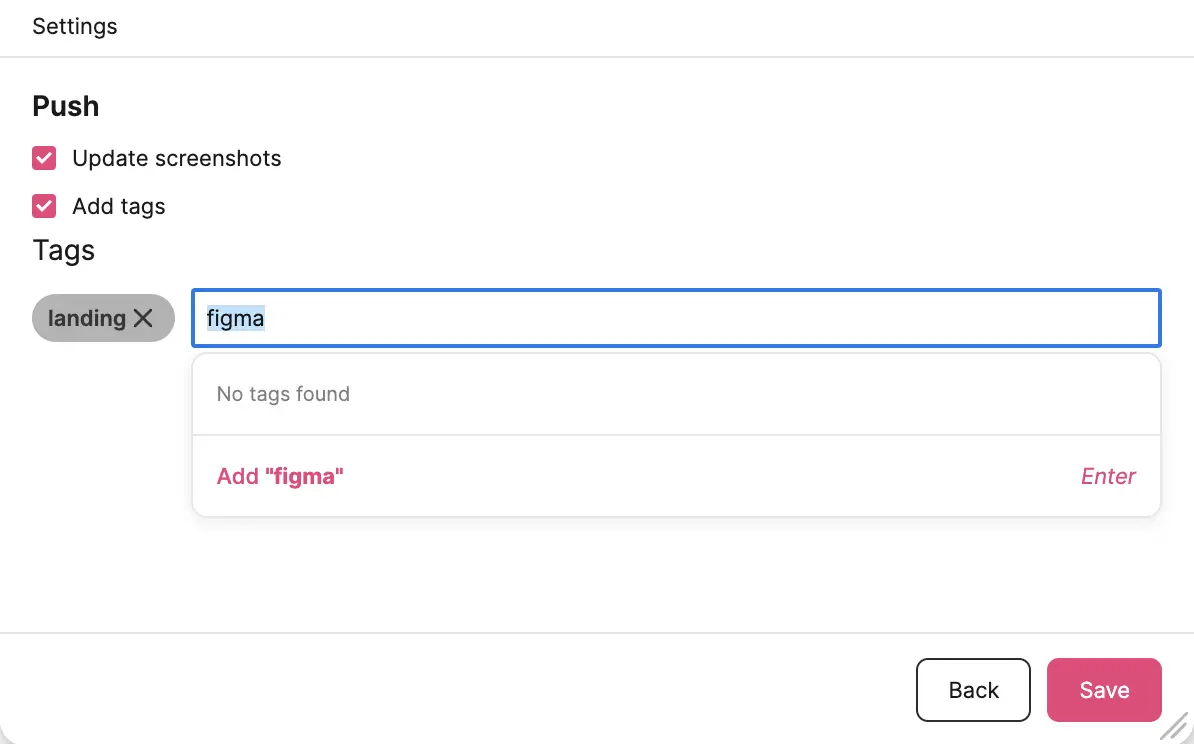
Push
The last part of the initial setup is called Push. Here you can choose if you want to update screenshots when pushing, which is turned on by default.
Another option is Add tags. It will include tags together with the keys that you push to the Tolgee platform. Pushing means adding the information from Figma to the Tolgee platform.
Here you can choose from existing tags or add new tags by typing and then clicking Add or pressing Enter on your keyboard.
Note: if someone adds a tag on the platform, it will not appear here - this function is just one way from Figma