Setup
Installing the plugin
First, you need to install the plugin from the Unreal Marketplace and add it to your project/engine.
Alternatively, you can clone the plugin from GitHub and compile it locally.
Enabling the plugin
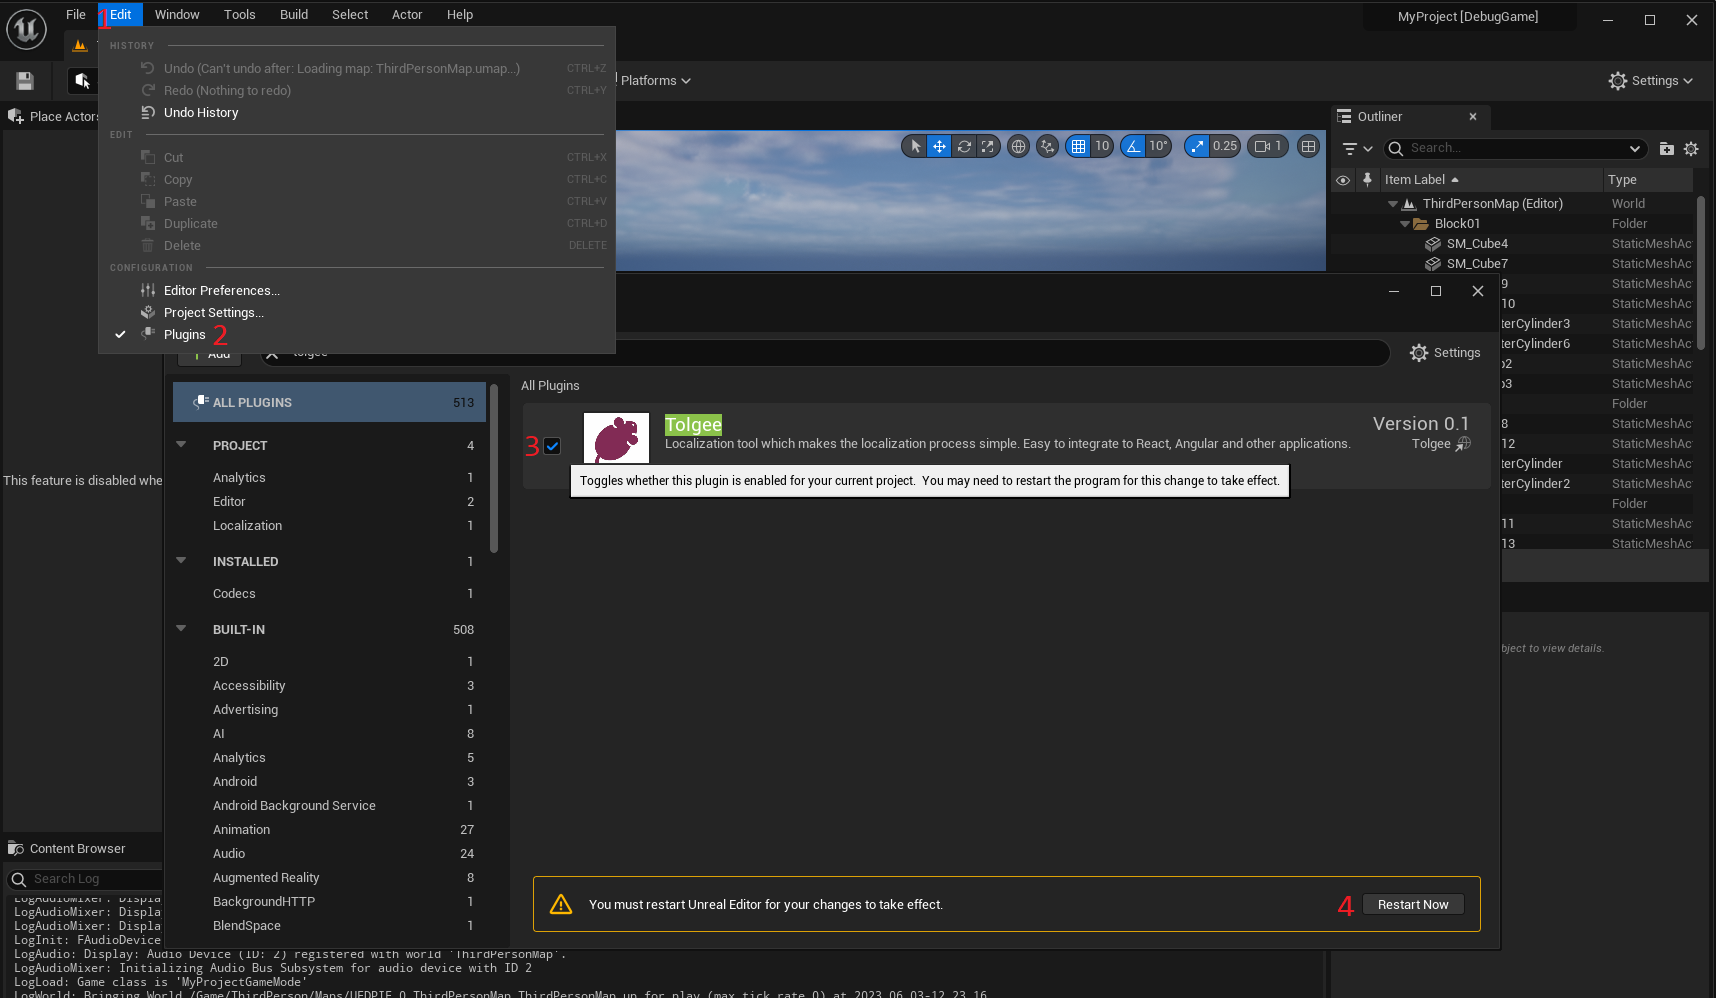
To enable the Tolgee plugin inside Unreal, perform the following steps:
- Navigate to the Toolbar
Editmenu - Open the
Pluginswindows - Find the Tolgee plugin and tick the checkbox next to it
- Press
Restart nowor restart your project manually
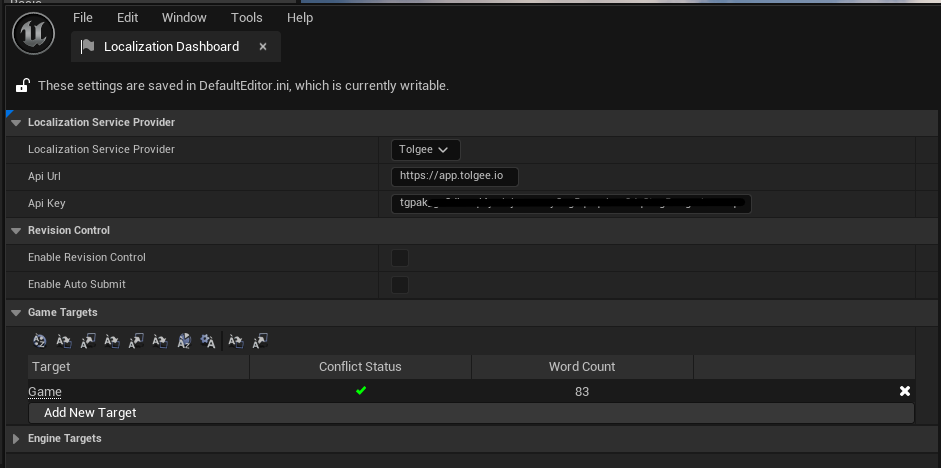
Localization Provider setup
Open the Unreal Engine Localization Dashboard (located at Tools → Localization Dashboard) and have the Localization Service Provider tab open.
Set the Localization Service Provider to Tolgee via the dropdown.
This will spawn 2 additional fields, set their values to:
- Set the
Api Url
If you are using the self-hosted version, you can change the URL to your instance.
- Set the
Api Key
If you don't have one, you can check out our documentation on how to generate an API key.
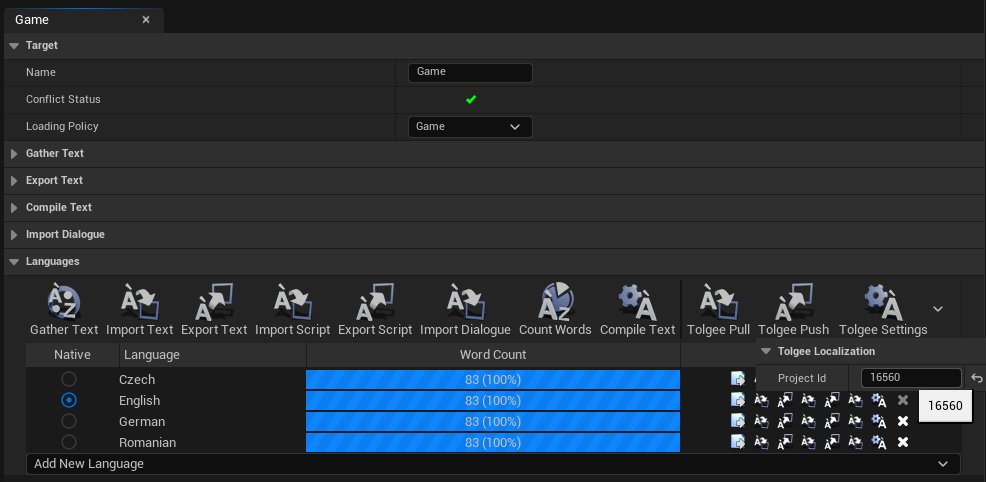
Localization Target setup
For each Localization Target of your game you want to connect to Tolgee, go under the Languages section you should have 3 additional buttons on the actions toobar.
Toglee PullTolgee PushTolgee Settings
Press Tolgee Settings and set the Project Id
The ID assigned to your project in Tolgee platform (visible in the URL)