Labels
Labels are available in the Advanced and Enterprise plans. Upgrade your plan to use this feature.
If you use the self-hosted version, labels are also available in the Advanced and Enterprise plans, and you need to set up the license to use this feature.
In Tolgee, you can use labels to organize the translation process. Labels allow for filtering translations by the label and are easily seen from the Translation view. It is important to note that you can use tags for the keys, while labels are used for individual translations and serve a different purpose.
Creating a New Label
Labels are added separately to each project in the organization. To add a new label:
- Go to Project Settings
- Select the Labels tab at the top
- Click
+ Label - Fill in the details
- Click
Add

In the + Label window, you can fill in the label name, color, and description. For the color, you can use the HEX color format or click on the square with the color to choose from a standard palette.
To edit a label, click the pencil icon to the right of its row.
To delete it, click the cross icon and confirm.
Assigning Labels
Important: Labels are assigned to individual translations or the base language terms, not to the keys themselves. For the keys, you can use tags.
In the Translation view, hover over the translation of the key or the base language term, and you will see a + Label button. After clicking it, you will see a pop-up menu where you can choose labels from a list of the labels that you have added.
You can assign multiple labels to a single translation.

Moreover, you can use bulk actions to assign labels to multiple translations at once. To assign labels to multiple keys at once:
- Select the keys you want to use by clicking on the checkbox on the left of the key
- In the bottom left corner, click the “Choose operation” window and select “Assign labels”
- Then, in the same place, two more selectors will appear, “Select languages” and “+ label”
- In “Select languages”, choose the languages you would like your labels to be applied to
- In “+ label”, select the labels you want to assign
- Click an arrow on the right to apply the bulk action
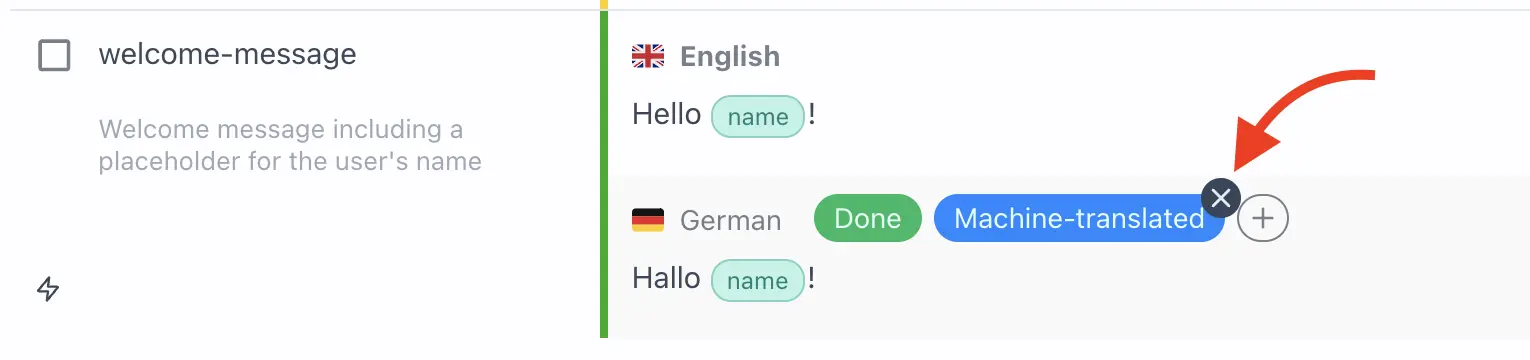
Removing Labels
To remove a label, hover over the label and click the cross that pops up.
Similarly, you can bulk delete labels. Follow the same steps as in the previous section, Assigning Labels, but instead, in the “Choose operation” window, select “Unassign labels.”
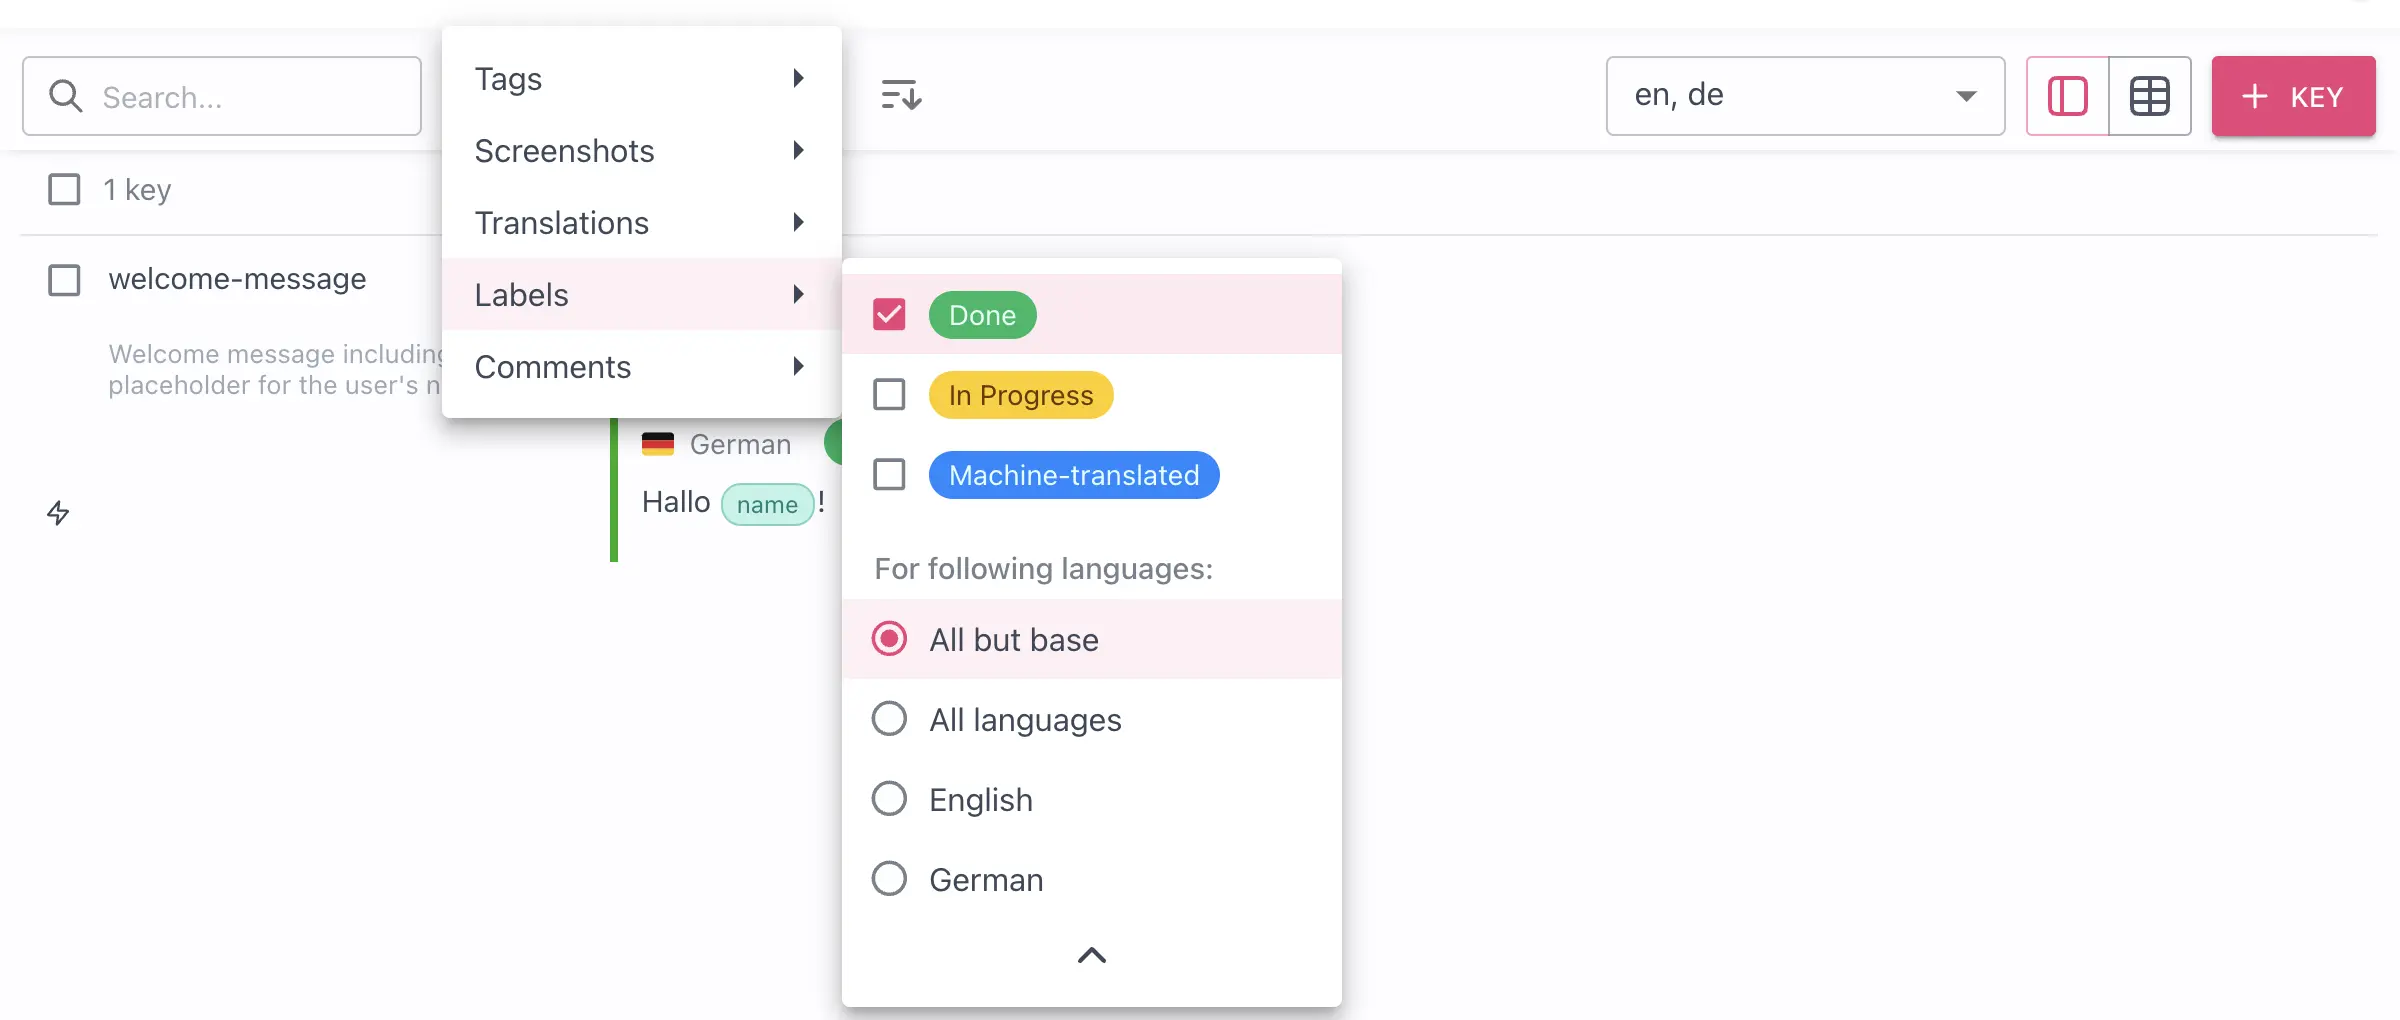
Filtering Key by Labels
The “Filter” menu is located at the top, near the “Search” bar.
- Click the
Filter...dropdown in the Translations view - Click
Labels - Select one or multiple labels
- Then, under the list of labels, select the languages you want to filter for
When selecting a language to filter for, you can select all but base, all languages, or an individual language.
Permissions for Organization Members to Use Labels
Members with Translate, Review and Edit permissions can assign and unassign labels for individual translations.
Members with Manage permission can also create, update, and delete labels in project settings.
You can choose how an individual member can use labels using Granular permissions. To give a memeber labels permissions:
- Go to
Memberspage - For each member, you can find the permissions menu on the right next to the cross button.
- Open the member's permissions menu and go to
Granular - You can find Labels under Translation permissions
- There, you can tick the checkboxes to give the permissions to
AssignandManage
Assign permission lets the member assign or unassign labels for individual translations or the base language term.
Manage permission allows creating or deleting labels in Project settings.
Label Activity
All the actions that are related to labels, like adding, deleting, assigning, and unassigning, are shown in the Activity window in the Project Dashboard