Glossaries
Glossaries help you maintain consistent terminology across your translations. You can create glossaries at the organization level and assign them to projects.
Managing Glossaries
This section describes how to work with glossaries and the terms in them.
Accessing Glossaries
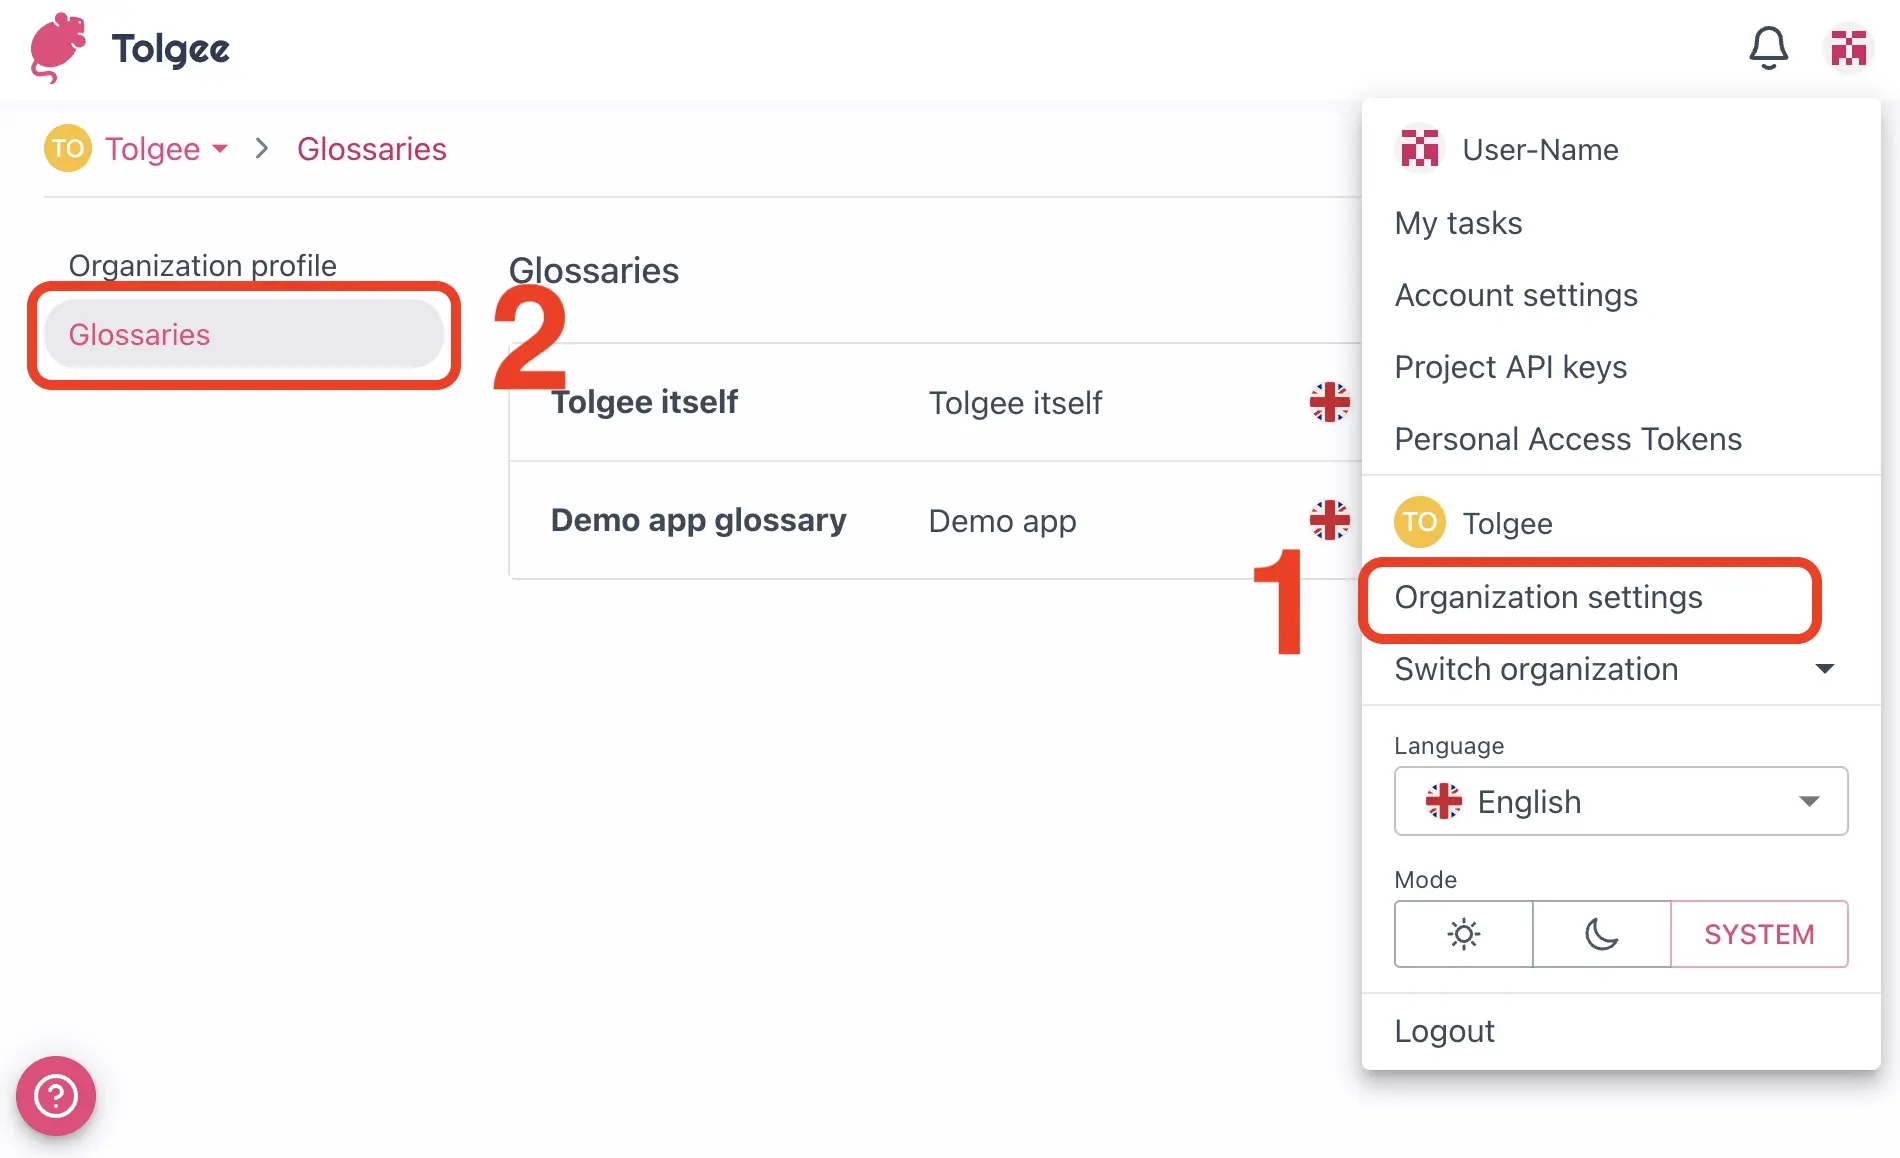
Here, you can see a list of glossaries in your organization.
- Go to Organization settings
- Select Glossaries in the side menu
It is important to note that a user can see all glossaries if they have access to any project within the organization.
The user can add a glossary and edit it if the access is set to at least a maintainer. You can edit the user's project access in the Organization members tab.
Creating a Glossary
- Click the
+ Glossarybutton to open the dialog window to create the glossary - Enter a name for the glossary
- Assign the glossary to projects (it is optional but essential for working with glossaries properly)
- Select a base language
- Click
Create - Next, you can add the terms with "+ Term" button
The base language and the glossary languages are derived from the projects that were assigned to the glossary. The languages can be added to the project themselves, and then they will be automatically assigned.
Adding Terms to a Glossary
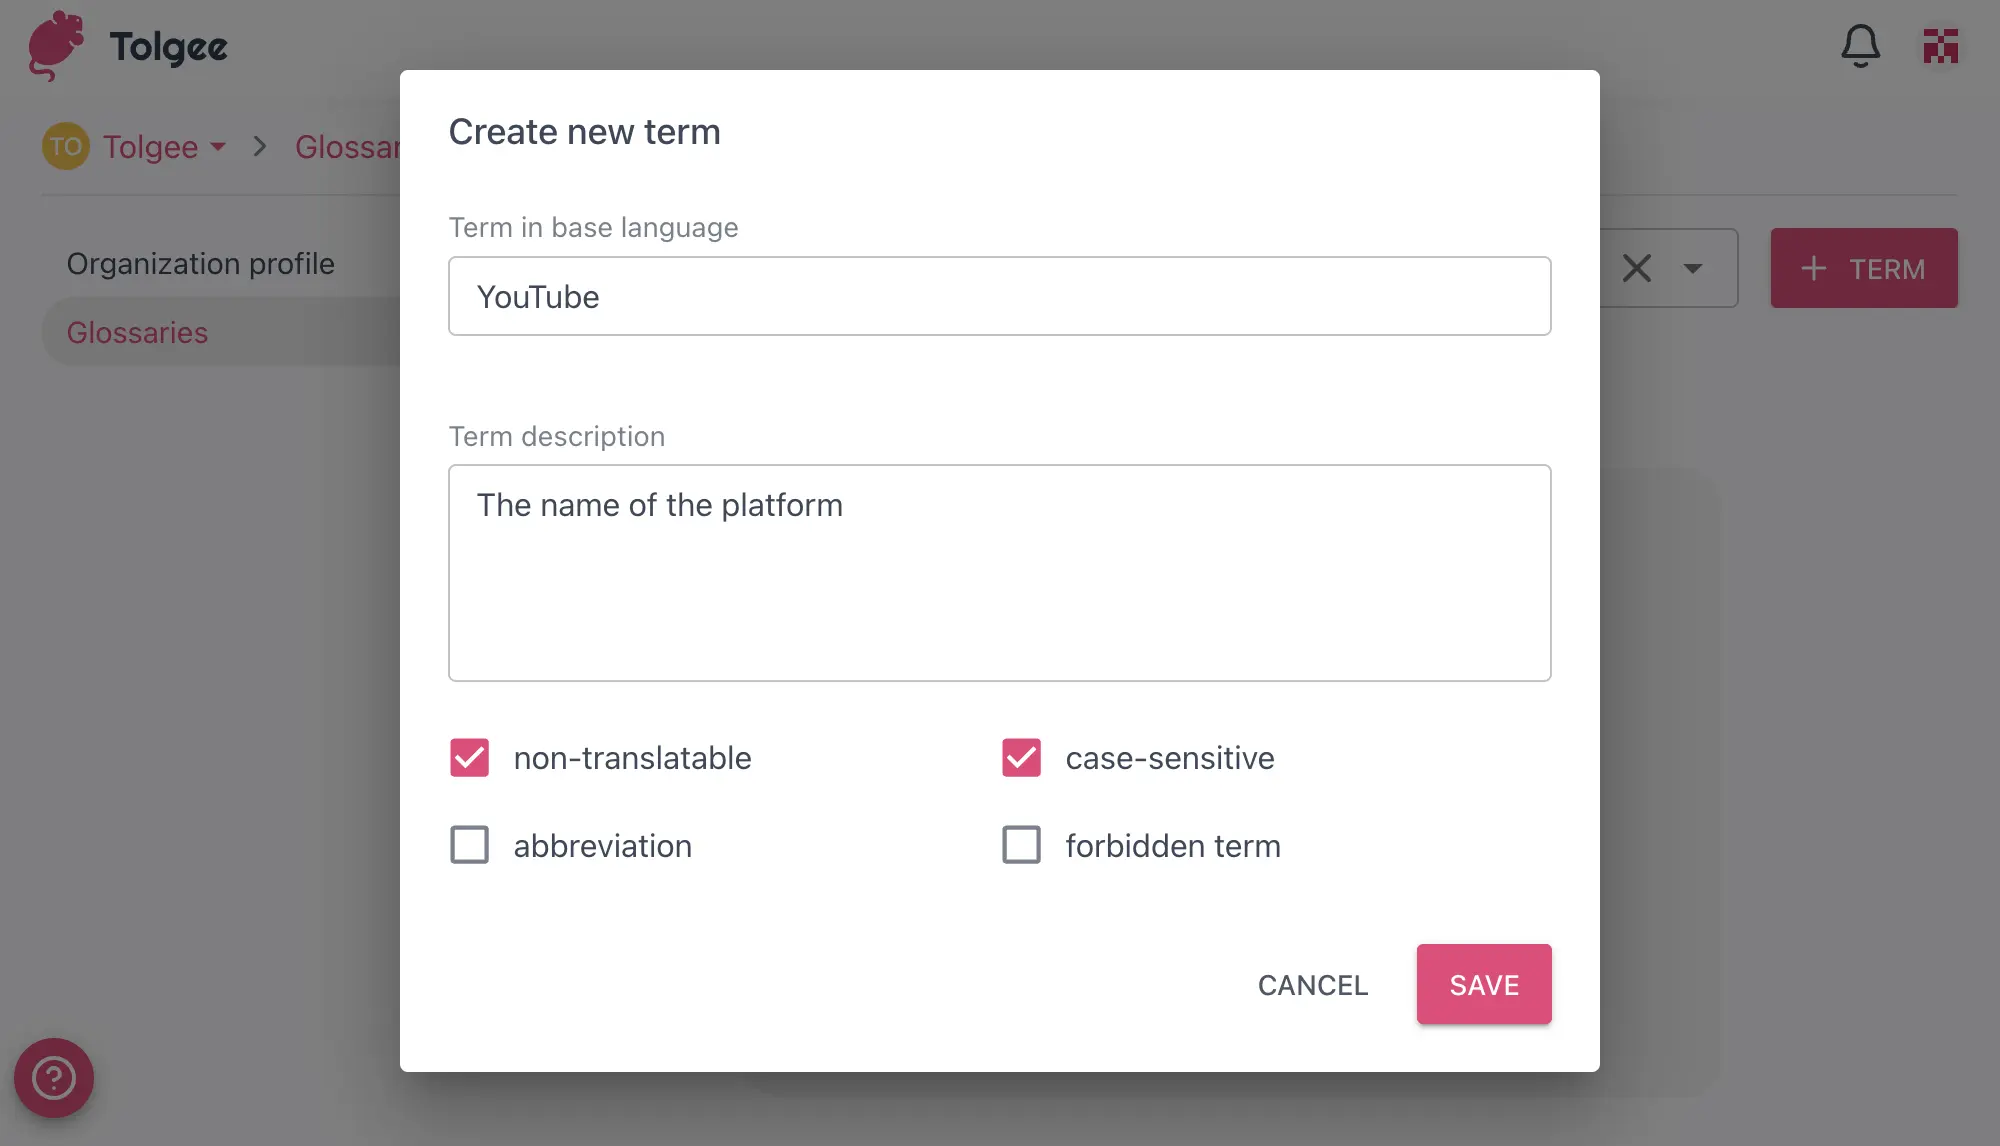
- In the glossary detail view, click the
+ Termbutton - Enter the term text
- Add a description
- Tick the checkboxes as needed to add the tags:
- Non-translatable: Indicates that the term should not be translated (in this case, you will not be able to click on the translations in the glossary)
- Case-sensitive: Indicates that the term's case should be preserved
- Abbreviation: Indicates that the term is an abbreviation
- Forbidden term: Indicates that the term should not be used
- Click
Save
Viewing and Editing a Glossary
- Open the tab Glossaries in Organization settings.
- Click on three dots
- Go to Settings.
Here you can edit the parameters of your glossary that you have set when creating it.
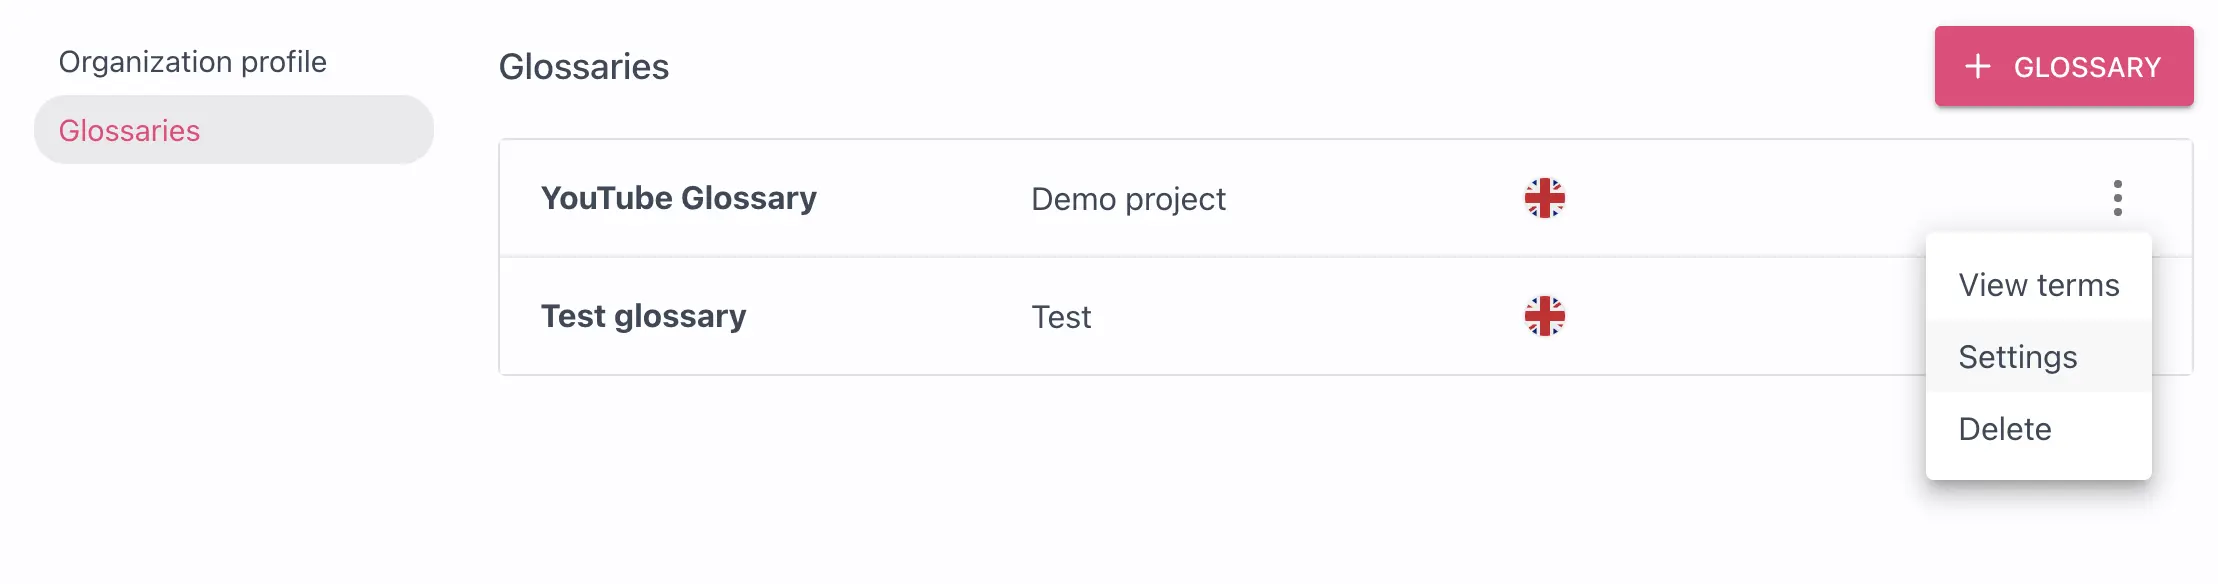
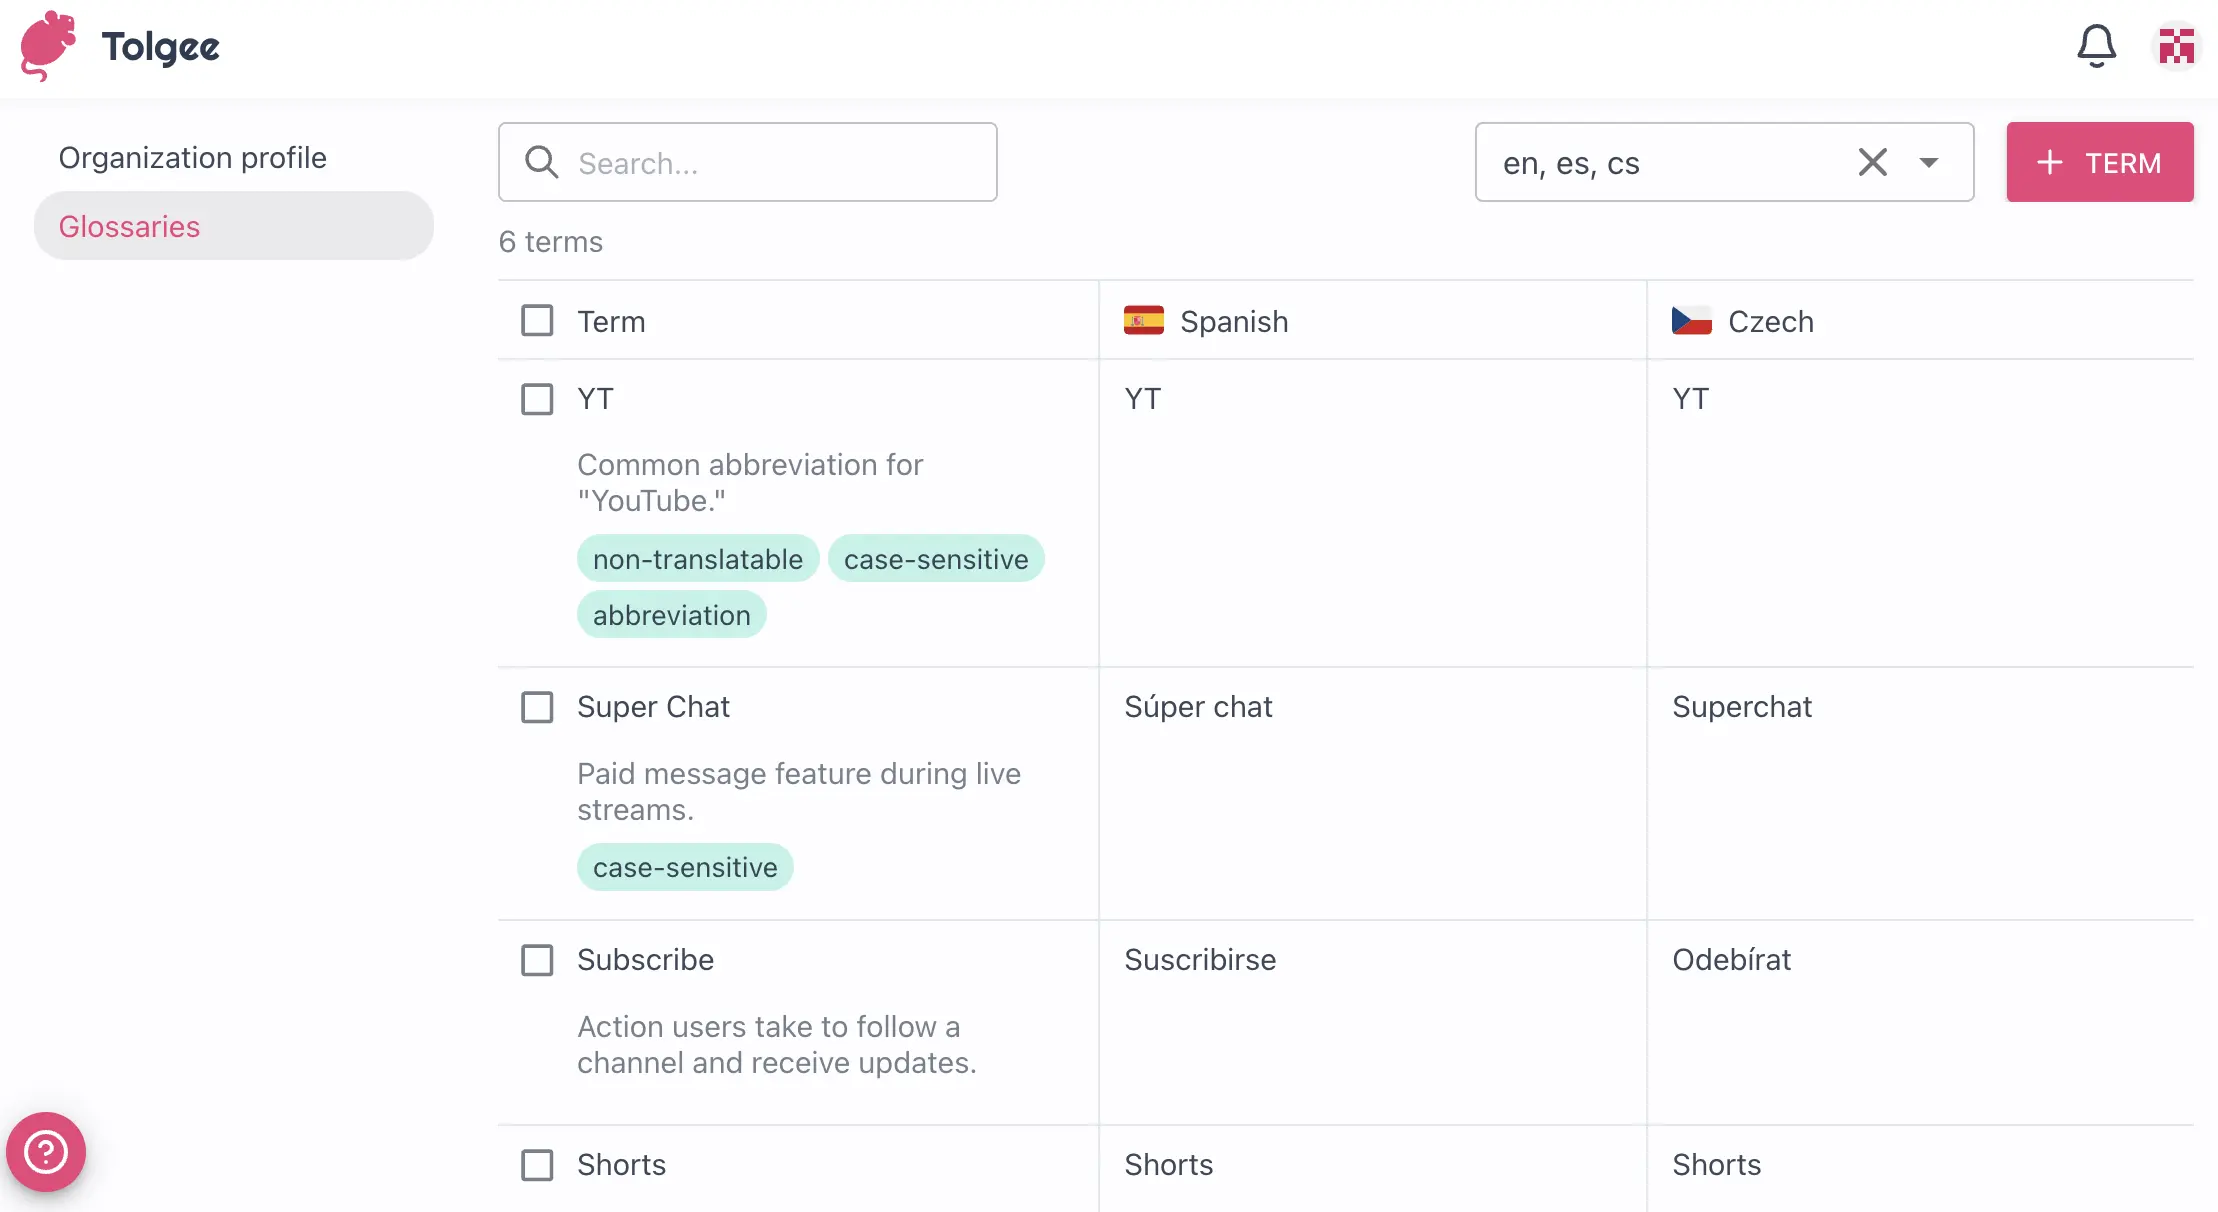
To see the terms of your glossary, click on the glossary you want in the list of all glossaries, and then you will be able to view the glossary terms.
From here, you can:
- Add new terms
- Edit existing terms
- Translate existing terms
- Delete terms
- Search for terms
To edit or add a term translation, click on the cell in the desired language column.
To edit a term or its details like the tags or the description, click on the term cell in its base language column (the first column).
Editing Terms
- Open the details of the term by clicking on the first column
- Update the term details
- Click
Save
Translating Terms
- Add the desired language to the list of languages in the top right corner next to the
+ Termbutton - Click on the translation cell for the desired language
- Enter the translation for the term
- Click Save
This will not work if the base language term has a "Non-translatable" tag as it will stay the same in all languages.
Deleting Terms
- Click on the first column of the term
- Click
Delete - Confirm the deletion
Also, it is possible to bulk select and delete multiple terms at once.
- Click on the checkboxes of the desired terms
- Select the action at the bottom of the screen
- Click the arrow button
- Confirm the action
