About Branches
Branching lets you create isolated copies of your project's data to work on independently. Different teams can work on separate branches simultaneously without affecting each other, then merge changes back when ready.
For a full list of what is branch-scoped versus project-wide, and which integrations support branching, see Scope and Integrations.
Branching is available on Advanced and Enterprise plans. Upgrade your plan to use this feature.
If you use the self-hosted version, you must set up the license to use this feature.
Common Use Cases
Managing multiple environments. Branches can mirror your deployment environments — for example, a main branch for production, a staging branch for QA, and feature branches for work in progress. Each environment's content delivery endpoint points to its own branch, so translations flow through the same promotion path as your code.
Updating translations without affecting production. When you need to rephrase UI strings or fix a translation, you can make the change on a branch and review it before merging into main. Production content stays untouched until you explicitly merge, so there is no risk of shipping incomplete or unapproved copy.
Translating a new feature before release. When a new feature is being developed, you can create a branch and add or update translation keys in isolation. The rest of the team continues working on the main branch without seeing incomplete or in-progress copy. Once the feature is ready, you merge the branch and all its translations land at once.
Preparing a release while translation work continues. Branches let you freeze a snapshot of translations for an upcoming release while day-to-day translation work continues uninterrupted on the main branch. The release branch can be reviewed, approved, and merged independently.
Experimenting with copy changes safely. If you want to try a different tone, rephrase key UI strings, or A/B test messaging, you can do it in a branch without any risk to production content. Discard the branch if the experiment is abandoned, or merge it when ready.
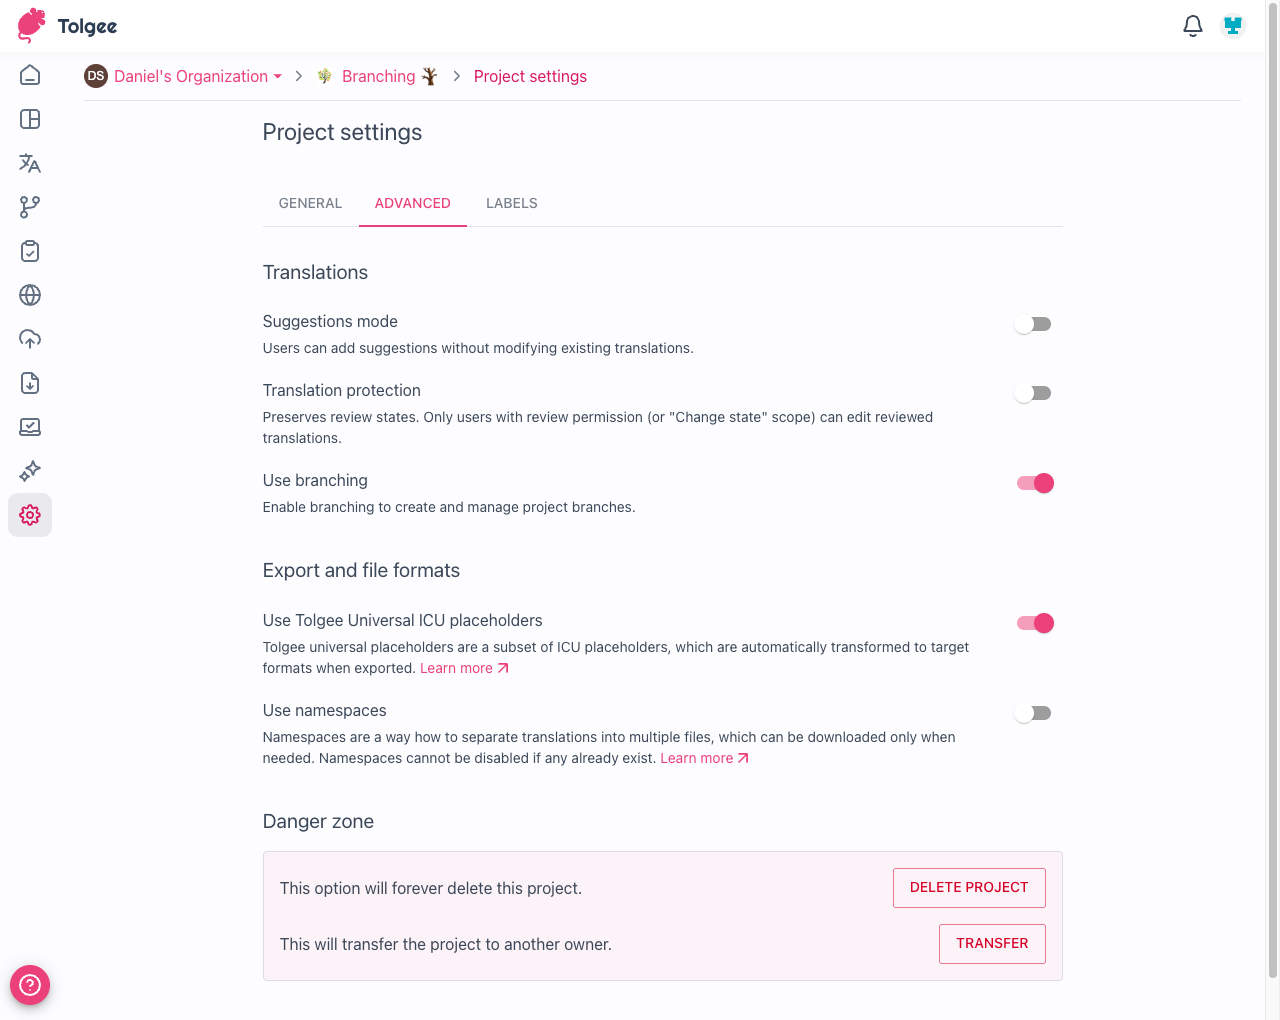
Enabling Branching
Branching is disabled by default. To enable it, go to Project settings → Advanced and turn on Use branching.
Key Concepts
Before working with branches, it helps to understand the following terms:
- Branch — an isolated copy of all translation keys and their translations at the point of branching
- Default branch (
main) — the primary branch every project starts with; it always exists and cannot be deleted - Protected branch — read-only by default; translations are typically changed via merge, but users with permission can still edit directly
- Merge — the process of applying changes from one branch into another, with conflict detection and resolution
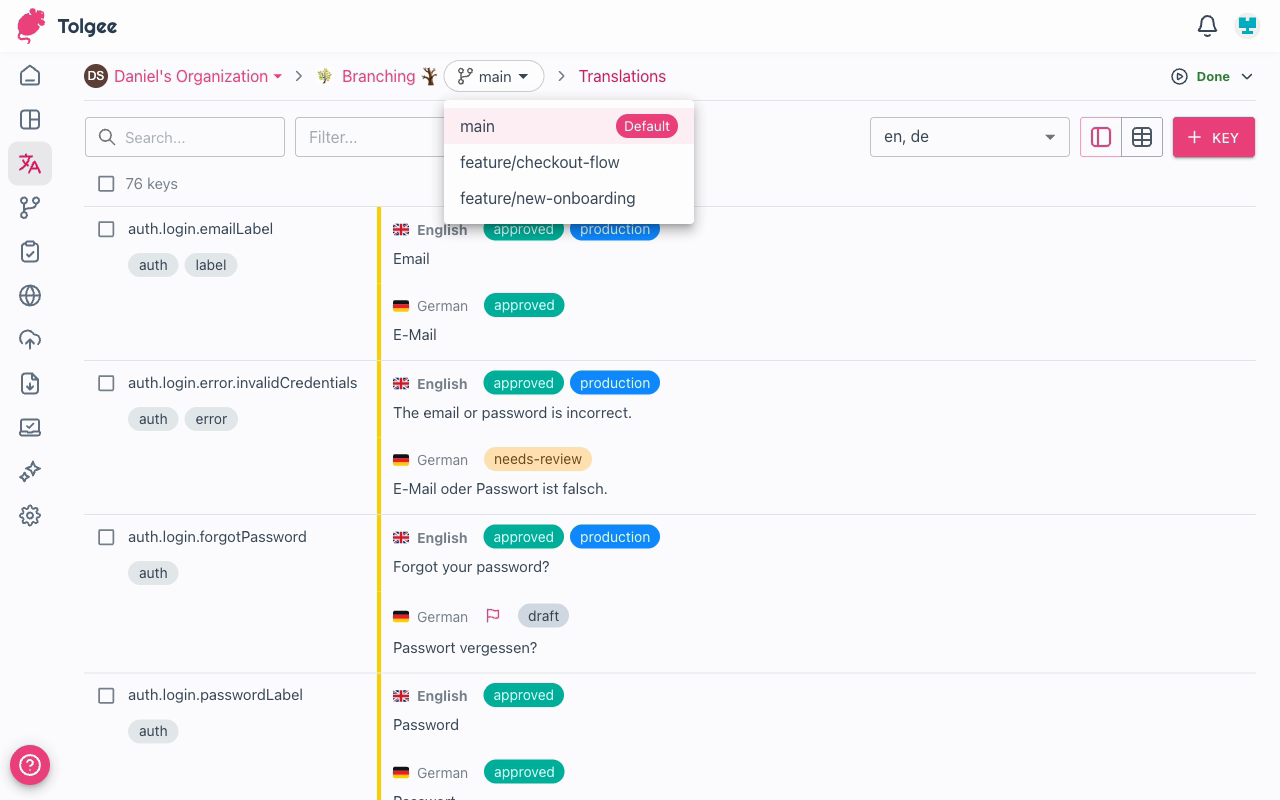
Navigating Between Branches
The branch selector in the breadcrumb bar lets you switch between branches. All views that work with translations — dashboard, translations, import, export, and tasks — reflect the currently selected branch. Click the branch selector to open the list of available branches and switch to a different one.
Content delivery configurations work differently: each configuration is pinned to a specific branch rather than following the branch selector. This lets you maintain dedicated CDN endpoints per branch — for example, a production endpoint publishing from main and a preview endpoint for a feature branch. See Content Delivery and Branches for details.
Managing Branches
Go to Branching in the project sidebar to manage all branches for the project.
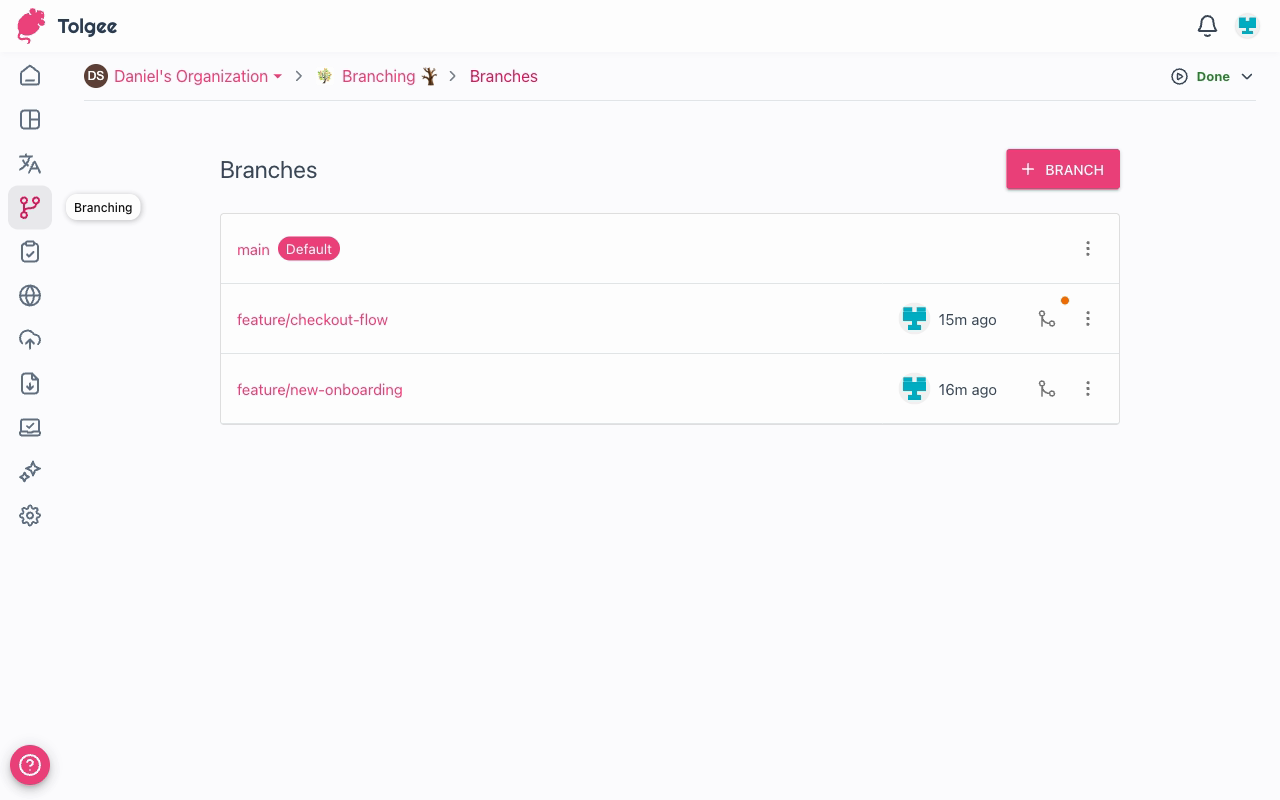
Creating a Branch
Click + Branch to open the create dialog. Enter a name and optionally select which branch to branch from — if none is selected, the default branch is used.
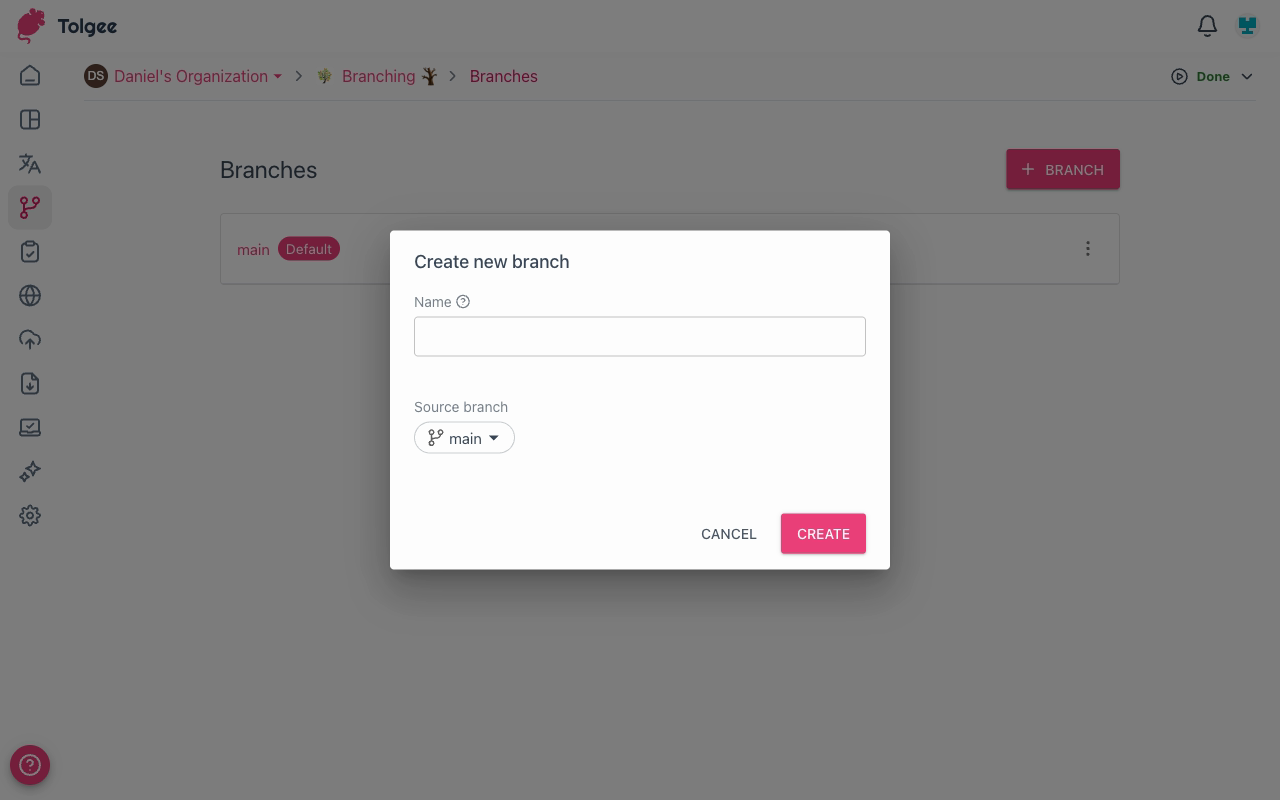
Branch names can contain letters, numbers, slashes, hyphens, and underscores. Slashes are commonly used to group branches by purpose, e.g. feature/new-onboarding.
Starting a Merge
To start a merge, click the Merge icon button next to a branch in the list. This starts a merge from that branch into its origin branch. See Merging Branches for the full merge workflow.
Renaming a Branch
Select Rename from the branch ⋮ menu to change its name.
Protecting a Branch
Select Protect from the branch ⋮ menu to make it read-only by default. Users with the Write to protected branch permission can still edit translations directly. Use this to guard stable branches like main or release branches. Select Unprotect to remove the protection.
Deleting a Branch
Select Delete from the branch ⋮ menu to permanently remove it along with all its translations.
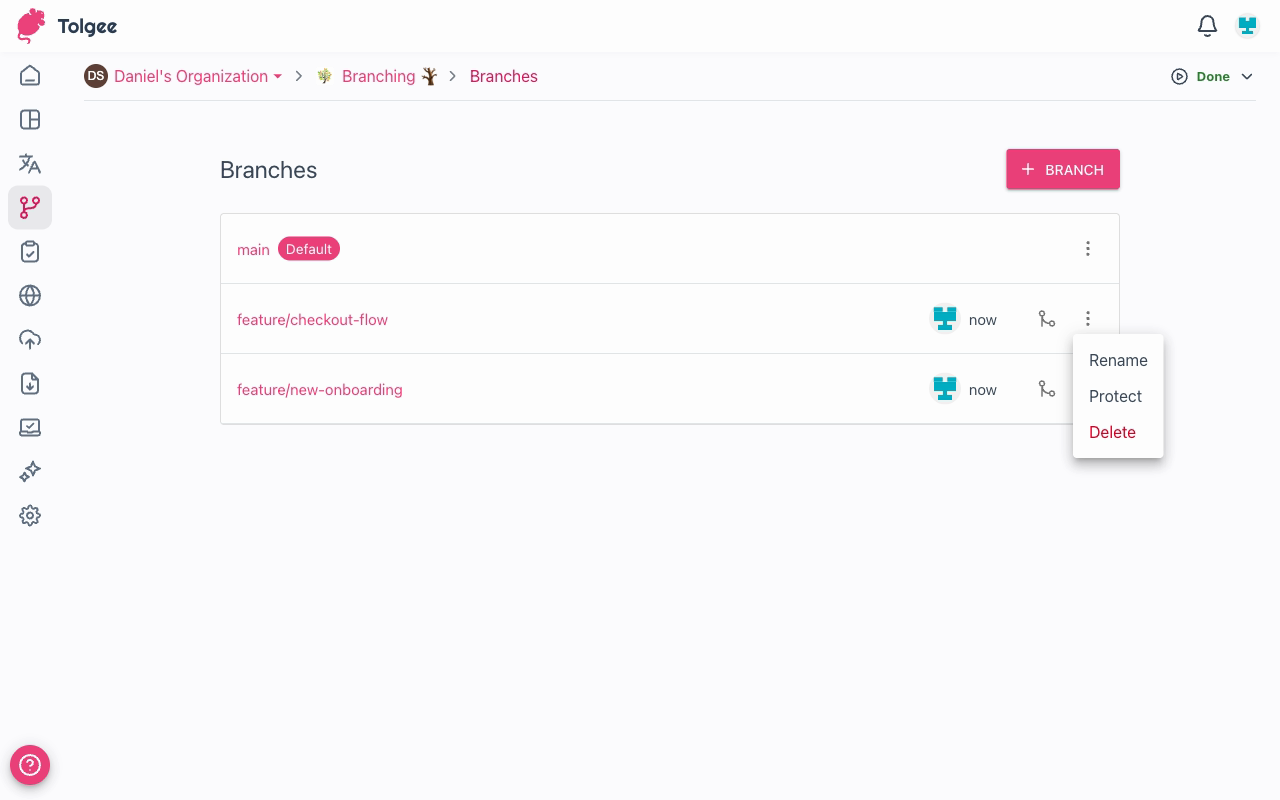
Deleting a branch is permanent. All translations that exist only in that branch will be lost.
Permissions
All project members can view branches and switch between them. Branching-specific permissions are controlled through the granular permissions editor.
To configure permissions for a member, go to your organization → Members, find the member, and click the edit icon next to their name. Switch to the Granular permissions tab to see individual permission checkboxes.
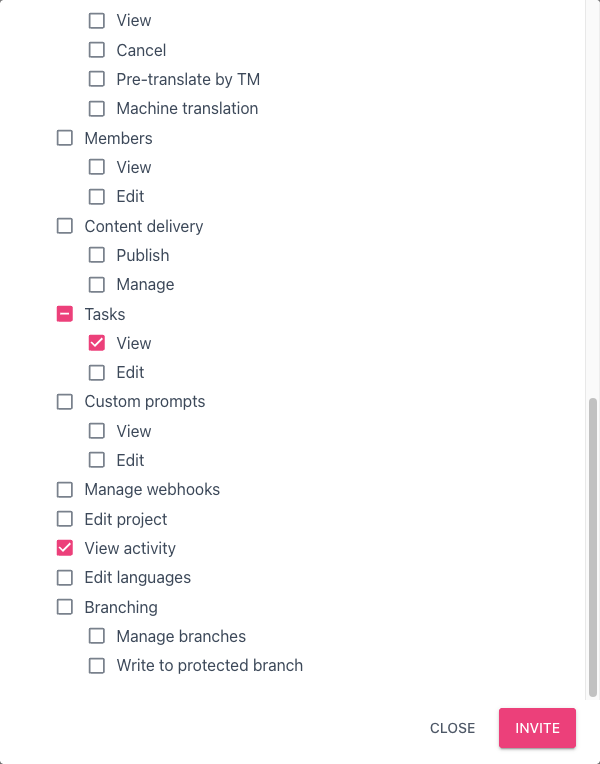
The table below summarizes the branching-related permissions:
| Action | Permission name |
|---|---|
| Create, rename, delete, protect branches | Manage branches |
| Merge branches | Manage branches |
| Edit translations directly in a protected branch | Write to protected branch |